Saturday, May 30, 2009

Card: Bridal Shower Invitation.

Here is the Bridal Shower Card Invitation that I did about a month ago now for a friend. I had to do 70 of these and the bridal shower it's self was today. And it was a lot of fun! The bride got some really really cute things... :) Makes me want to have a bridal shower of my own... LOL :)

Any ways, here is one of the cards that I did. They were all the same, just some slightly difference in the color of the paper.

Used:
CTMH stamps.
CTMH ink.
Cricut cartridges used LS, AE and Stamped.
Some swirl stickers from Target
Some jewels.
Ribbon
SU scalloped punch
Some chalk

I did have help with these. The brides sister and some of my friends came over to help. I originally had only 3 days to do these. But we found out the night that the date had to be moved for later and I could have had more time to do these.... But at list they were all done.

Here are some pictures.

This one was taken with out the flash.


With a flash.


A tag that came out of the pocket with more info on it.


Inside of the card.


Thanks for looking.

Nadya :)

Wednesday, May 27, 2009

Need a good laugh? Check this blog out....

A friend of mine that I have never meat... LOL :) but have talked too through e-mail and we are both part of the same scrapbook message board has started a very very funny blog!

Check it out... it's called Consultant Calamities...

There are stories from all kinds of home base parties, shows, business what ever you want to call it. Consultants and representatives from all over the place are sending in some very funny stories that they have encountered in their home base businesses.

Check them out and don't forget to send in your funny stories to her!

Now go and have a good laugh!!!!

Nadya :)

I stabbed my self with a knife last night..... :(

I should really stick to easy make dinners and not try anything fancy. Should go back to my chicken and pasta nights.... LOL :)

Last night I was making (yet another pasta dish) Spaghetti. I had brown beef on the stove and I was going to cut up some sausage to make it more lumpy and better I guess. The sausage was frozen. I went with a knife towards my left hand to open the package the knife slipped and went right in between my thumb and pointer finger.

It's about 1/4 to 1/2 inch cut, but about 1 1/2 dip.

I have a knife phobia this did not help me at all. I felt sick right away. Good thing that as I was yelling for Katherine to get me my cell it rang and it was dh. He called my best friend to come over and check my hand out.

I couldn't even look at it. I took the knife out grabbed a towel and squeezed so the blood doesn't gush out.

My arm started to feel numb little after wards, but I think that was because I was squeezing it so much. I didn't got to the ER or anything. There was a big traffic on the freeway (yes we have one freeway going in that direction) and dh didn't think that sitting in that for 3 or how ever many hours would be a good thing. So we decided to see what the morning will bring.

My hand is sore this morning. But it's not feeling numb any more, so that's good.

I had no clue how much you use those two fingers until you can't use them that well. Dh wrapped up my hand last night and I could not do anything. If I'd move the fingers the cut would hurt and little of skin would rip. Yuck!

So now I miss the use of my thumb and pointer finger. I have a lot of projects that need to be done by this Saturday. I have a recipe album to finish for a bridal shower, a memory game for a birthday party not to mention the stuff that I need to do around the house.

So that's how my evening was yesterday.

Nadya :faint:

Friday, May 15, 2009

"3 Wooden Decorated Boxes" for silent auction. Lots of pictures.

I got the wooden boxes from Ben Franklin Craft Store again.

Painted with red and yellow acrylic paint. I actually had a friend paint them as I was working on more the one thing at a time and she offered to help. So that was a big help!!! :)

Used mod podge for the paper. Used lots of different cricut images and other die cuts that I had laying around.

I have one of the crayons boxes for my girls and they love it. The crayons don't seem to be getting broken. I like that part as I get tired of picking up little peaces from crayons.

Also used Prima flowers, bug brads, buttons, scrappers floss, stickles.
All kinds of papers.
Cricut cartridges that were used are: My Community, Life's a Beach, Doodlecharm.

Here are some pics... Again there's going to be a lot of pictures...

The set.
Image

The large box, top.

Image

Image

Image

The sides. All these images came from the "Life's a Beach" cartridge.

Image

Image

Image

Image

The middle box...

Image

Sides.

Image

Image

Image

Image

Small box.

Image

Sides.

Image

Image

Image

Image


Thanks for looking!!!

Nadya


"Freindship" jewelry wooden altered box for silent auction.

I'm really upset that the pictures of this box didn't turn out good at all. You can't see any details at all. The things that I wanted people to see the most are all blurry... But I'll post them anyways.

This was so much fun to do though. We had a lot of people wanting this box but only one was able to win it.

Wooden box came from Ben Franklin craft store. Painted with pink and green acrylic paint. Stamped large flower with foam flower from K&Company. Then I went over with a white jell pen to make the flowers pop a little. Ribbon from WalMart. Angel charm with "HOPE" in the middle from WalMart. Prima flowers with buttons that also came from WalMart. The flowers that you see on the lid are rub-ons from K&Company. I got them at Walmart as well.

The word "Friendship" and the swirls in the corners are CTMH stamps and I used StazOn white ink to stamp it on. And jewels that I got from Target.

The box also came with 2 girl bracelets and 1 necklace that one of my awesome friends made.

Here are the pics....

Image

Image

Image

Image

Image

Thanks for looking!!!

Nadya

"FAMILY" wooden altered letters/word for silent auction.

I know I'm posting lots of pictures. So I hope that you all don't mind that. It's just that when I'm searching for something and I need pictures to see how it's all done and up close always helps. So here I am posting lots of pictures.

I just LOVE how these letters turned out. I just wish that my pictures turned out better. You can't really see the stickles and the colors all that great.

But here we go anyways.

The letters were donated to me by my friend Ivy from SS and now a very good friend in real life. She's awesome!

I used CM papers (don't remember the name of the pack), Crystal stickles on the flowers, jewels that I picked up at our new Target... (hee hee :) ), prima flowers and ribbon. I used glue dots to keep the ribbon in place where I tied the knot.

Here are the pics..

Image

Image

Image

Image

Image

Image

Image

Image

Image

The sides were painted with cream like color acrylic paint.

Nadya

Wednesday, May 13, 2009

"Happy Birthday Kit" for the silent auction basket.

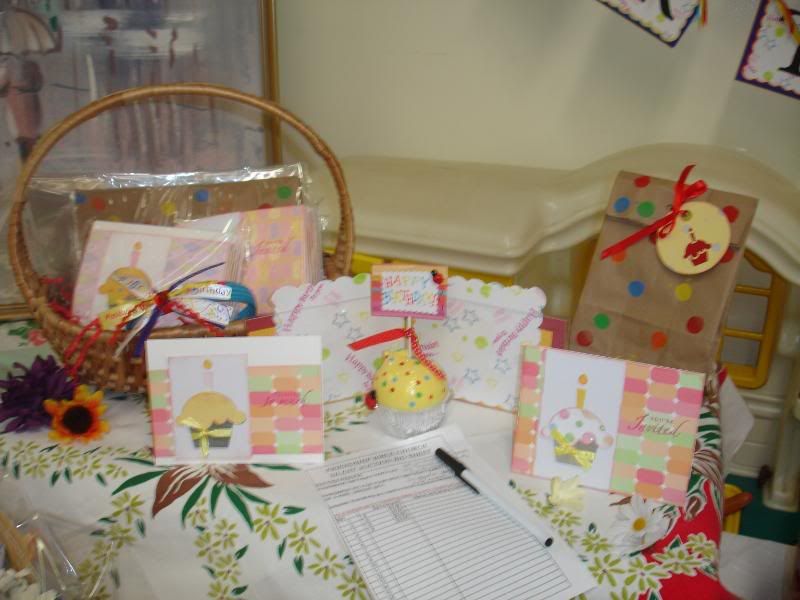
I thought it would be awesome to have a basket full of birthday stuff in it.

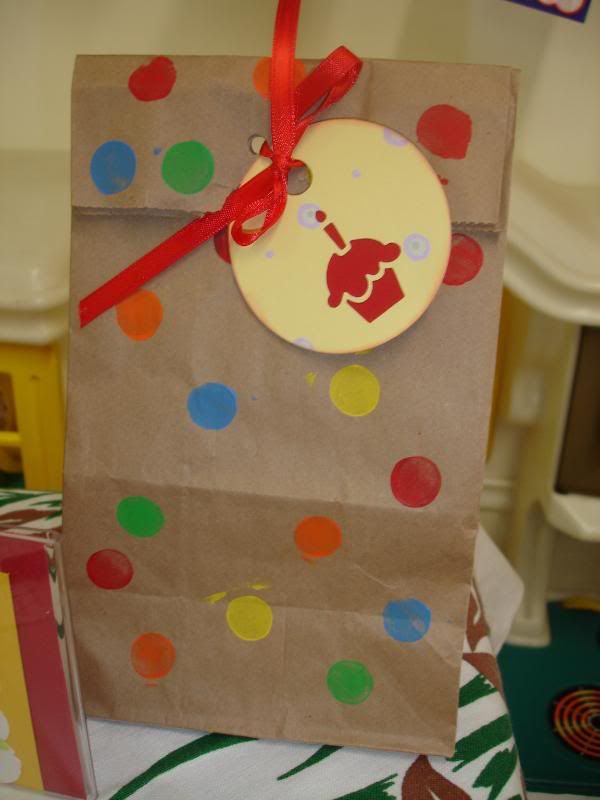
So me and my friend made a "Birthday Party Kit" basket. It had everything you needed for your birthday. I made 20 invitations, 20 Thank you cards all with envelops. I made 20 pre-made ready to go goodie bags.

We had a birthday frame. My friend made this really cute birthday cup cake tag thing, really cute, she also made a birthday hair band.

I also made the "Happy Birthday" banner. I used card board from the CM page protectors cut it to size 5 1/2 by 5 1/2, painted the squares with blue acrylic paint. Cut out the scalloped squares using cricut from the Accent Essentials cartridge, size 5 inch. The red part is the shadow so it's the same size as the white paper just shadow. The images on the white paper are all hand stamped. I used all kinds of stamps on them but mostly from CTMH. Added some fun bright colors of ribbon and done. It turned out really really awesome and I personally didn't want to sell it...

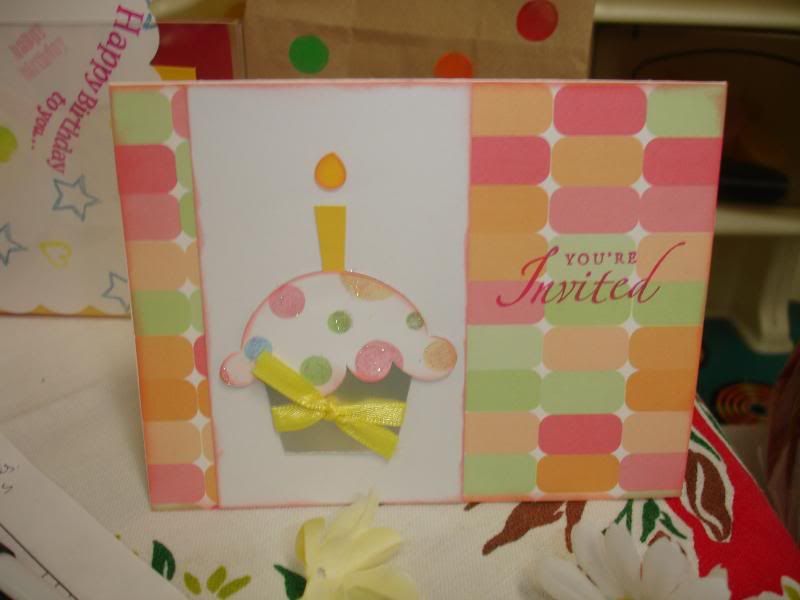
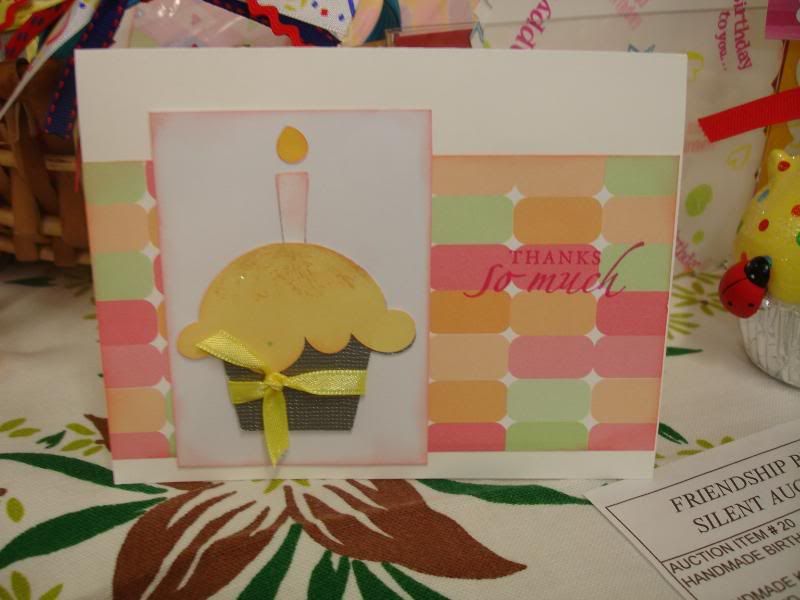
The cards, I used the cup cake from the Doodlecharm cartridge.

(Sorry ladies if I'm getting the wrong names for the cartridges, don't have them in front of me at the moment.)

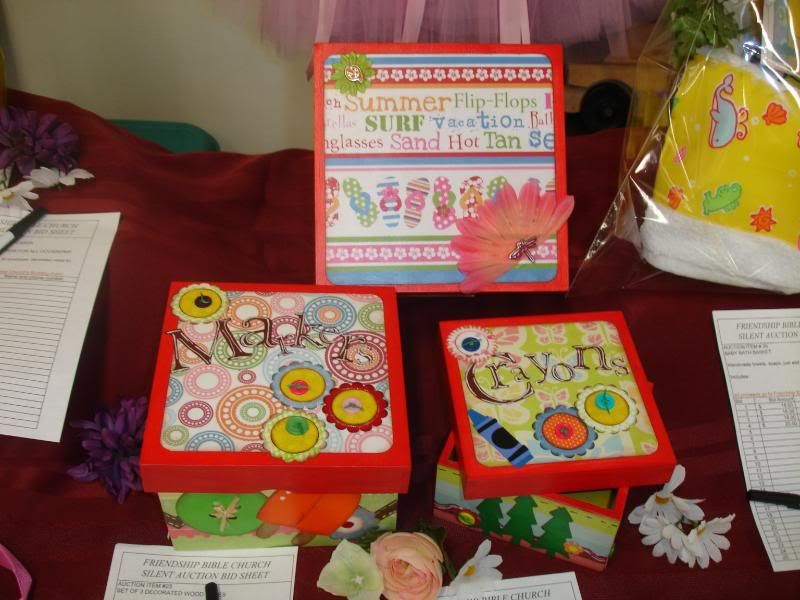
Here are some pictures of this basket.

Image

Banner.
Image

Invitation card.
Image

Thank you card.
Image

Goodie bag.
Image

Here are couple of up close pictures of the banner. Again... the pics didn't turn out all that great.

I totally forgot to take pictures of all of my stuff at home before we set everything up. And the day I took these pictures I had only 2 hours of sleep. I staid up to finish things up. But anyways....

Image

Image

Image

I made the holes for the ribbon to go through using the Eyelet Setter Tool Kit from Making Memories. I used the biggest size to punch through the card board. Then I just tied the knot with the ribbon on the front side.

It was so easy to make the banner and so much fun!!!! I'll have to make one for my self now so I can use it for my girl's birthday parties...

Thanks for looking!
Nadya